


Are you getting the most out of your boat? Duncan Wells shows you how
a little knowledge can go a long way when you’re heading to windward

Numerous volumes have been written on the subject of sail trim.
For some it’s an obsession, for others, an afterthought.
Even if you never intend to race your yacht, a grasp of the principles of sail trim is something you can apply to any boat you step on board.
Apply these to a yacht you sail regularly and you’ll find quiet satisfaction in exploiting the true potential of the boat as it rewards you for your efforts.

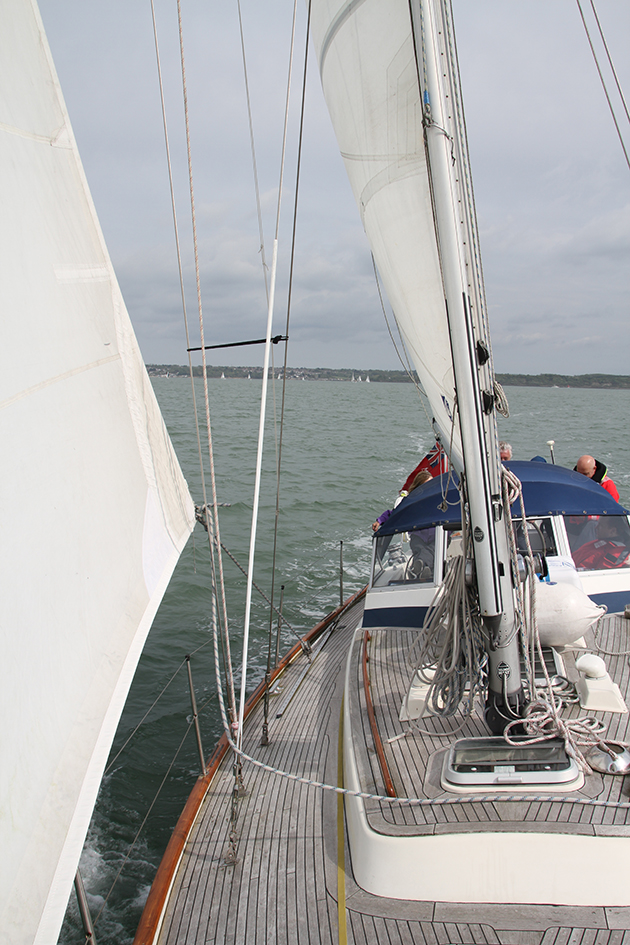
Sailing to windward in moderate airs, you want the headsail and main to work together to create as much forward drive as possible
To a cruiser, sailing faster equates to sailing further and the possibility of new cruising grounds.
For the purposes of this article, we will concentrate on sailing to windward. Modern yachts, particularly monohulls, do this very well.
With a good set of sails, a well-set-up rig and some time spent practising trimming, you’ll find you are able to make big gains in terms of the angles you can sail. However, modern yachts are also easily overpowered.
The crux of modern sail trim is understanding how to balance your sails and the power they generate with the resistance of your keel.
The end product of a well-trimmed yacht is one that’s a pleasure to sail, easy on the helm and faster through the water.
The physics
When we are sailing to windward, the sail acts like the wing of an aircraft. Air passing over it produces a low pressure area on the lee side and a high pressure area on the windward side, which creates lift.
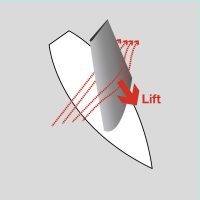
This lift from the sails is countered by the lateral resistance of the keel. Without a keel, a sailing boat would simply go sideways. But, as long as the total force – the centre of effort on the sails – is countered by the lateral resistance of the keel – what’s known as hydrodynamic force – and these forces are in balance and acting in line with each other, the boat will sail forwards.

Duncan Wells is principal of Westview Sailing, author of Stress-free sailing, and inventor of LifeSavers (LifeSavers.co.uk)
On the physics front, we also need to consider wind shear. The friction of the water on the gradient wind causes it to back and slow down the closer it comes to the surface of the water and so there is a difference in wind speed and wind angle between the top of the mast and the deck.
The higher up, the greater the wind speed and the more the wind angle moves aft. The lower down, the lower the wind speed and the more the angle moves forward (backed).
So we need to be able to adjust the twist in our sails to take advantage of this.
The headsail acts as the forward driving force, and the main, affected by the sideways force of the wind, is more like a rudder, turning the bow to windward as it powers up.
So we need to know what sail shape we should be making to get the most out of the wind we are given.
In light airs, we want a fuller sail shape – a more powerful shape – and in heavy airs a flatter, less powerful shape.
There are several elements that we can adjust for the headsail; twist, depth and draught position. And for the main; twist, depth, draught position and helm balance.
All of these can be adjusted easily with the exception of draught position, which requires us to alter the halyard tension. And as I don’t think it’s realistic for us to be running up and down tweaking halyards for every point of sail and wind strength, I’m leaving draught position alone.
The controls for adjusting the set of the headsail are:
■ Forestay tension
■ Halyard tension
■ Position of
the sheet lead
■ Car on the
genoa track
■ Sheet tension
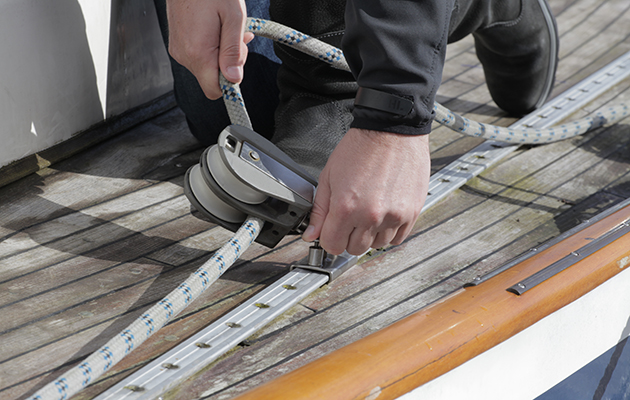
1. Set the headsail halyard

Vertical creases in the luff means the halyard is too tight
Raise the headsail and set the halyard tension to get rid of any horizontal creases, but not so much that you introduce vertical creases. This will ensure it is as efficient as possible. A headsail that has vertical creases means that the halyard is too tight.
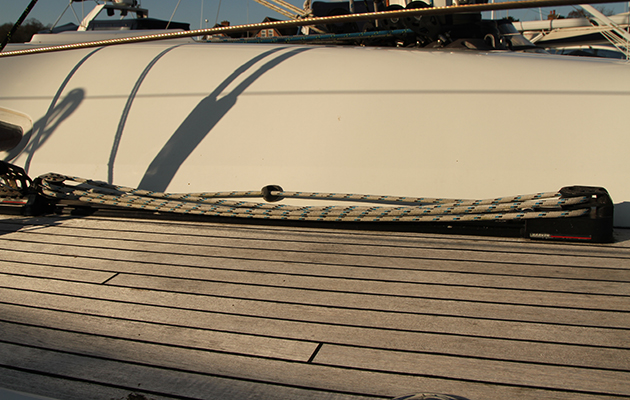
2. Set the genoa car
Follow the sheet from car to clew so its angle projects 50% up the luff.
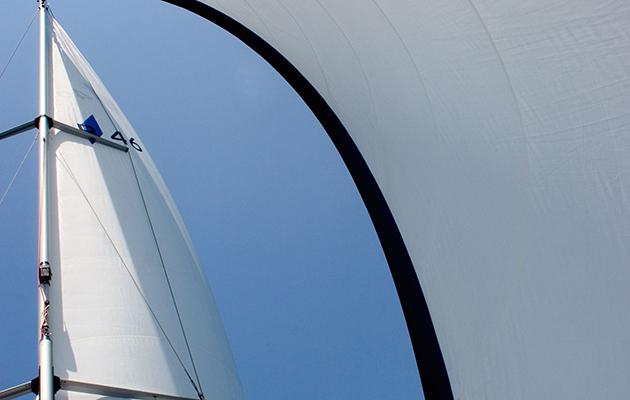
3. Check the sheet angle
Sailmakers often add a line from the clew to show you the correct basic angle. With this set, you can move the car forward to tighten the leech, or move if aft for more twist.
4. Use tackle system to adjust as you go
If you have a tackle system for adjusting the car then you can trim as you go, just as long as the sail isn’t under a great amount of pressure. This will allow you to ‘play’ with the ideal trim much more easily.
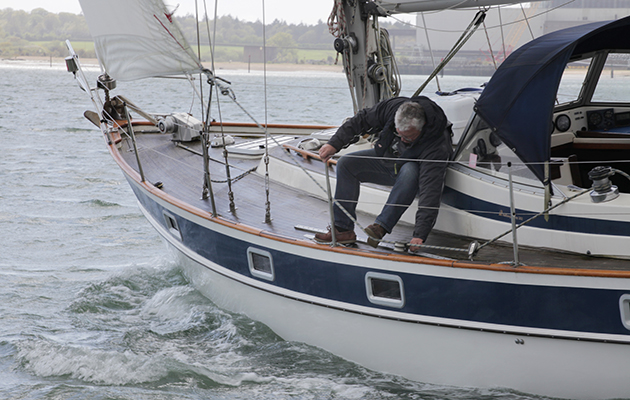
5. Luff up to reduce pressure
If you do not have a tackle system or are in strong winds, then you will have to luff up to take tension off the sheet and move the car along the track. Working with the helm to do this efficiently takes practice. You can put a foot on the sheet between the car and sail to take the load.
6. Get the twist right
As you tighten up on the wind, you’ll need to move the car aft so that the leech does not become too tight. In medium airs, you want maximum drive. The leech and the foot should have roughly the same tension. The telltales should all be flying and the headsail shouldn’t backwind the main.
7. Coming off the wind

Close hauled, you will have sheeted in until the leech of the sail is close to the spreaders. As we bear away, we will ease the sheet for the correct sail setting, but this will allow the leech to be very open. The key to good headsail shape is having control of the leech so as you come off the wind, you will move the car forward to close the leech and increase the power of the sail.
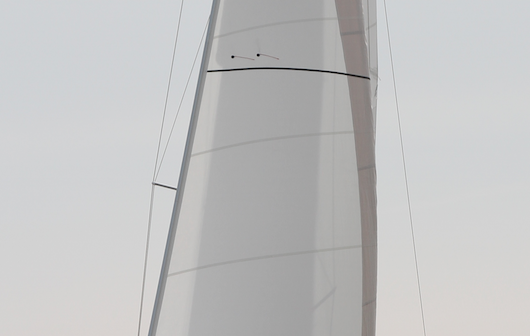
8. Focus on your telltales
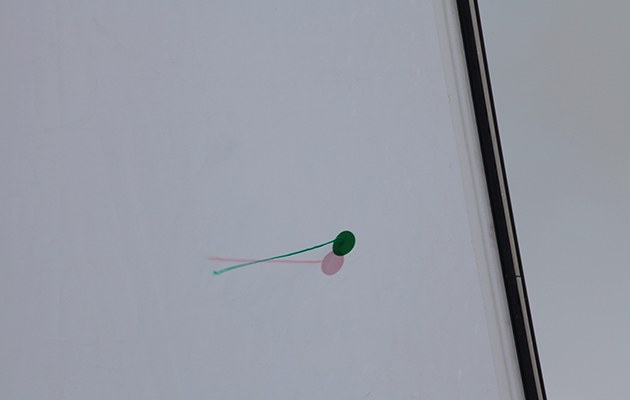
The clue to whether the sail is set nicely, besides speed, is given by the telltales. These tell us about the airflow at a specific part of the sail. This set of telltales show a good airflow over both sides of the sail. Make sure your top telltales are also flying properly: if the inner telltale is stalling, move your car forward to reduce twist.
9. How many telltales?
One should have three sets of telltales, a set each at 25% of the way up the luff, 50% and 75%, and they should be about a foot in from the luff. Try not to position telltales by a seam because generally, being made of wool, they will get caught up in the stitching. If you have a furling headsail, you may want to set telltales for each of your reef positions – they can be stuck on easily.
10. Stronger winds

In stronger winds, we want to reduce the power of the sail so we open the leech to spill some air by moving the genoa car aft and sheeting in. Again, we will monitor the set of the sail by checking the telltales and adjusting the car position and sheet accordingly. Not everyone has three sets of telltales on their headsail and if we only have one set, making sure that they are flying at all times should ensure you are getting the best performance out of the sail.
11. Working with the main
Once your headsail is set, check it isn’t backwinding the main (making it luff). If it is, you may need to ease the sheet.
12. Older headsails

Sails bag with age, causing the draft to move aft. You can lessen this on the headsail by increasing luff tension and moving the genoa car further aft. Better still, get a new sail or see if a sailmaker can recut it.